Reliable and robust
- Cleanliness inspection prior bonding, painting, coating, welding, hardening, or gluing
- Layer thickness inspection of corrosion protection oils and lubricants, or primer application before bonding
- Inline measurement: contact-free, non-destructive, layer thickness sensitive
Advantages
- Detection of filmic contamination: contact less, non-destructive, layer thickness-sensitive
- For process analysis and optimisation
- Documented process quality
- Flexible system solution to specific customer control tasks
- Scalable to multi-sensor system
- Automation solution combinable with robotics
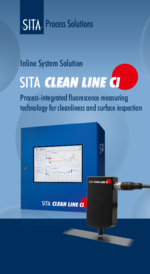
The system solution SITA clean line CI can be customised to the inspection tasks due to its modular hardware and software concept.
The software SITA ProcessControl uses real-time capable automation components for control and data processing. The system can be customised depending on the requirements using different interfaces for integration in the higher-level process control as well as operating and display devices.
The system solution is easily scalable: from compact systems with one sensor to multisensor systems for complex tasks, e.g. several production lines can be monitored centrally.
For integration we cooperate with your automation and robotics partners. In a joint analysis our SITA application engineers develop the SITA clean line system solution to fit your application.
Line Scan
Continual monitoring of band surface Cleanliness with one or more sensors.
Surface Scan
Detecting the cleanliness profile of part surfaces with an X-Y positioning system.
Free Form Scan
Measuring the cleanliness of part surfaces with a 3D positioning system.
Practical examples
- Cleanliness inspection of wires, pipes and steel strip prior to coating
- Inspection for residues of release agent on aluminium die-cast parts prior to adhesive bonding
- Inspection of functional surfaces after selective cleaning (laser cleaning, ultra-fine plasma cleaning, CO2 snow blasting, …)
- Monitoring the primer application prior to lamination of plastic profiles
- Monitoring the application of corrosion protection oil (quantity, distribution)
- Inspecting large metal parts prior to coating and printing
- Determining the distribution of contamination on parts surfaces in the production process
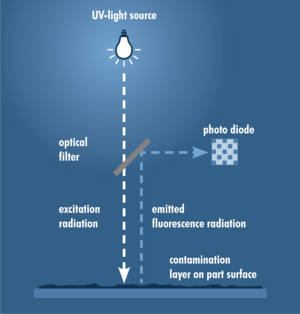
The measuring method uses the characteristic of organic substances to fluoresce. UV light is focused onto the surface. The contamination fluoresces. The intensity of the Fluorescence increases with the layer thickness of the contamination. The intensity is measured in RFU (Relative Fluorescence Unit) in relation to SITA fluorescence standards.
The lower the measured value in RFU, the cleaner the surface.
| Sensor | ||
|---|---|---|
| Measuring range | (0 ... 2,000) RFU (Relative Fluorescence Unit) | |
| Measuring deviation | max. 0.5 % of measuring range | |
| Excitation | 365 nm, max. 150 mW | |
| Detection | 460 nm* | |
| Measuring distance | 4.7 mm* | |
| Diameter measuring point | 1 mm* | |
| Sample rate | up to 100 Hz | |
| Dimensions (HxWxD) | 95 mm x 50 mm x 30 mm | |
| Weight | 200 g | |
| Interface | RS-485 | |
| Power supply | 24 V | |
| * bei Standardoptik | ||
| Control | ||
|---|---|---|
| Real-time capable industrial PC in control cabinet | ||
| EtherCAT-based (Software PLC) | ||
| Hardware modules for input and output interfaces | ||
| Optional touch display | ||
| Control of multiple sensors | ||
Simply get in touch with us. You can find the contact details of our sales and application department under contact persons.
For support in your country, please see our international sales partners.
Alternatively, send an e-mail to info@sita-messtechnik.de, call us at +49 351 288 53-0 or send us a message using the contact form.


